Our Precious Grandblessings
With God at the center of our lives, even the simplest of things are infused with peace and joy!
❤
Showing posts with label Gettin' Crafty. Show all posts
Wednesday, November 4, 2020
Cricut Fun
I finally had a chance to personalize my water bottle with my favorite scripture!
If you are a crafter, please leave a comment with a link to your blog so we can stop by and visit!
Sunday, December 22, 2019
Another Use For Scarves
From six men's scarves......
to a farmhouse tree skirt.
I need to adjust it a bit more though, it's crooked. Lol I love it and the best part is it was only six dollars!
Saturday, December 21, 2019
Christmas Crafting
I wanted a rustic topper for the tree in our bedroom but was NOT going to pay $25 for one so I made my own. It's not by any means perfect, but that's the way I like things!💕
Time for another craft...........................
From this........
....to that!
Time for another craft...........................
Porcelain Look
I bought these bells at Dollar Tree. I am using a black Sharpie to outline the holes and around the middle to make them look like distressed porcelain. The great thing about this is that I don't have worry about being careful with my outlining! 😁
Thursday, December 19, 2019
HO HO HO
I made this HO HO HO sign with a small piece of wood, wrapping paper and black letters (that I painted with white chalk paint) from the Dollar Tree and a chalk pen to do the snowflakes. Super easy!
Thursday, October 11, 2018
A Special Treat
I have been spending some good quality quiet time in my War Binder. I have really enjoyed decorating it while spending time in The Word. I have been keeping my supplies in a box inside a tote bag and it was getting a little bothersome to constantly remove everything to get to the box on the bottom.
I took Skippy to work this morning because I had a bunch of things on my to do list and needed the car. It started with my Girls Gathering group early this morning then on to pick up 3 dozen brown eggs I was getting from a dear friend we used to live near. After that I had to run home and get Kiddo to take him to get his hair cut and a shave. After he was done with that we were supposed to go grocery shopping but storms and the heavy downpour messed a lot of that up due to not being able to drive above a crawl on the interstate. Because it took us so long to get to there we only had 20 mins to grocery shop so we had to scratch that off the list for today.
Since we only had a few minutes before we had to leave to go get Skippy from work, we went to Micheal's since it was right across the street from the hair salon.
I was looking for the We R Memory Keepers shaped punches and was thrilled to find them on a Buy 1 Get 1 50% off sale. I bought WRMK washi tape punch and a Fiskars corner rounder. I also found washi tape for $5 a tube, which was $10 off. But my favorite deal of the day, my special treat to myself, was this craft organizer I found for 50% off, bringing it down to only $14.95. WAHOO, COOKIE!! 😁
I love that now everything has a special place. Pockets on the sides and front with a magnetic pocket......
Space for all my washi tapes and colored pencils.....
mini alphabet stamps, glue sticks, rubberbands to add extra inserts and a pair of scissors.
I took Skippy to work this morning because I had a bunch of things on my to do list and needed the car. It started with my Girls Gathering group early this morning then on to pick up 3 dozen brown eggs I was getting from a dear friend we used to live near. After that I had to run home and get Kiddo to take him to get his hair cut and a shave. After he was done with that we were supposed to go grocery shopping but storms and the heavy downpour messed a lot of that up due to not being able to drive above a crawl on the interstate. Because it took us so long to get to there we only had 20 mins to grocery shop so we had to scratch that off the list for today.
Since we only had a few minutes before we had to leave to go get Skippy from work, we went to Micheal's since it was right across the street from the hair salon.
I was looking for the We R Memory Keepers shaped punches and was thrilled to find them on a Buy 1 Get 1 50% off sale. I bought WRMK washi tape punch and a Fiskars corner rounder. I also found washi tape for $5 a tube, which was $10 off. But my favorite deal of the day, my special treat to myself, was this craft organizer I found for 50% off, bringing it down to only $14.95. WAHOO, COOKIE!! 😁
I love that now everything has a special place. Pockets on the sides and front with a magnetic pocket......
clear rubber stamps, note cards, stickers and punches.......
I'm excited that I was able to get some really great deals today and can't wait to get into my War Binder tomorrow!
Good bless~
Laura
Monday, October 1, 2018
My War Binder
I made some time over this past weekend to get started on my War Binder. I'll
admit I've had it for months and have done nothing in/to it, but that is
changing. It's nothing fancy, but it's a start!

Sunday, April 24, 2016
Busy Hands
"Make it your ambition to lead a quiet life, to mind your own business,
and to work with your hands, just as we told you, so that your daily
life may win the respect of outsiders and so that you will not be
dependent on anybody."
1 Thessalonians 4:11-12
Saturday, June 20, 2015
For My Skippy Man
Skippy has to work today and tomorrow after church is our Vacation Bible School set up so I will not be home to celebrate Father's Day with my hubby. We were going to go out for breakfast this morning but no one wanted to get out of bed. lol
My Skippy Man is hard to gift for because he never really says what he would like to have. I love making homemade things. I think I came up with the PERFECT gift this time since I do know ONE thing he likes to get......TOOLS!

My Skippy Man is hard to gift for because he never really says what he would like to have. I love making homemade things. I think I came up with the PERFECT gift this time since I do know ONE thing he likes to get......TOOLS!
I hope he likes it!
Thursday, February 26, 2015
A New Business
I made this "Established" sign for my from G-Girl for Christmas. I posted it on facebook and immediately started getting orders. I am THRILLED that people really like my work.
Thank you, Father, for this unexpected opportunity!

Thank you, Father, for this unexpected opportunity!
Monday, June 16, 2014
Relay For Life Quilt
Well, the elephant baby quilt I was going to make recently got
put on hold. I was asked to make a Memory Quilt for Relay For Life to
be auctioned off at our event we had this past weekend on the 13th. My friend G-Girl and I
had never done a Relay quilt before so this was a new experience for
both of us.
G-Girl is the main designer of our quilting duo. She can come up with the most BEAUTIFUL designs. I don't do block designs very well. I love to design "picture" quilts like the owl quilt I made for my granddaughter. So, we set to work with a fierce determination. Squares were sold for a $10.00 donation on which we embroidered the name, date of birth-date of death and a ribbon with the color of the cancer each person had battled. Just between our families alone we had seven squares. The block below is for my sister.
After we received all the names and embroidered each square we put together our quilt. We decided on a "stained glass theme" since it was being done through our church's Relay team. On June 13th, our quilt was auctioned off and it raised an INCREDIBLE $3,100.00 for the American Cancer Society. To say we were pleased was an understatement.
It was a bittersweet day. One of the names on the quilt was a
beloved friend in our community who battled breast cancer for 18 years.
Her sister is the one who purchased the quilt. Then we had an
anonymous donor give the buyer $2,500.00 to go towards the quilt. It
was an emotional day all around!
I thank God that we were able to be part of such an amazing event!
Friday, March 21, 2014
A Productive Day
HAPPY SPRING, EVERYONE!!
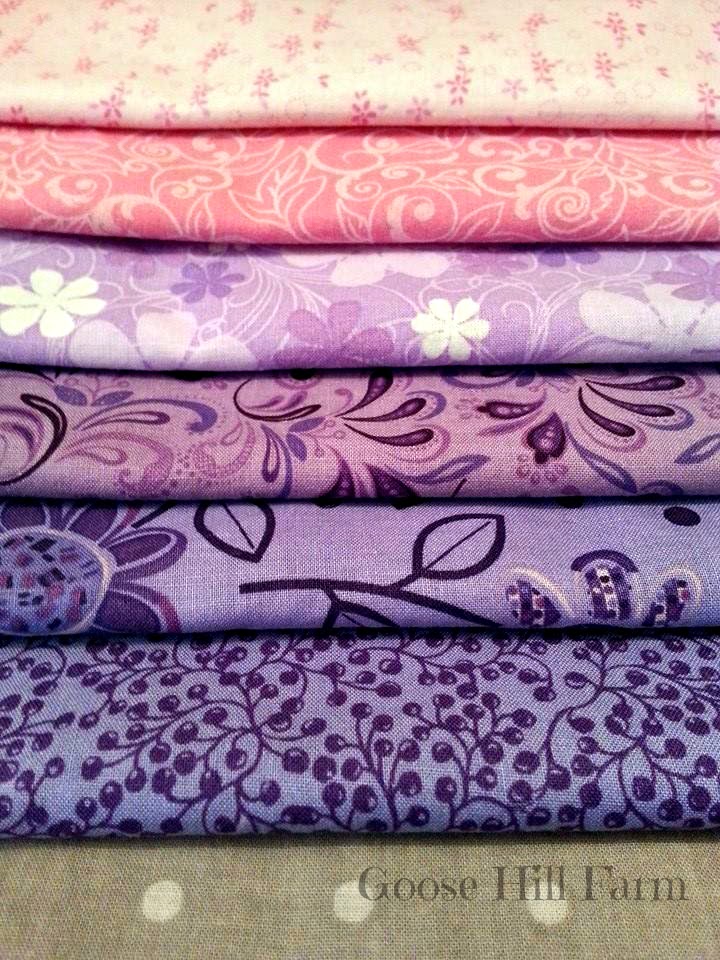
I am very thankful that I was able to spend a nice, relaxing, productive time at home today. Aside from the usual things that need to be done to keep our home running, I had the opportunity to get my fabric ready for a quilting project I will be working on..........
redo the cover on the cell phone.......
and make my very own tart warmer.
I had wanted to get another one for the
kitchen but they run around $10.00. I had an idea in my head but wasn't sure how to put it together. I went
around the house seeing what I had to use and this is what I came
up with. It may not look pretty but it serves its purpose and does a great job making the kitchen smell soooo good!
What projects have YOU been working on?
Blessings~
Laura
Laura
Wednesday, November 20, 2013
I FINISHED IT!
After going through and locking up 6 different sewing machines, I was finally able to finish the quilt I started for my granddaughter. I absolutely LOVE how it turned out!!
What craft/sewing projects have you been working on lately?

What craft/sewing projects have you been working on lately?
Thursday, October 18, 2012
REPOST: Gettin' Crafty - Handmade Personalized Picture Coasters
I have had requests for the directions for these coasters so here it is!
I absolutely LOVE to make things whenever I can,
but I truly enjoy it most of all, when I get to create gifts for those special people in my life for their birthdays, anniversaries, weddings, and Christmas, etc. Here is one of the gifts I made for Bean coasters Don't worry, she won't see these pics. My family doesn't read my blog unless I tell them too! lol
Why have BLAH looking coasters , when you can have BEAUTIFUL and PERSONALIZED coasters instead? Remember.....you can you decorate these with any picture, graphics, you want!
These coasters are SOOO CUTE and SUPER UBER EASY TO MAKE! For these personalized coasters, you will need the following:
4 ceramic tiles in your choice of color, texture, and size (I like the textured 4x4 ones from Home Depot @ .31 cents each)
4 squares of scrapbook paper and cut these whatever size you want for your tile. I wanted a nice border of tile to be seen because I thought it was really pretty, so I cut mine paper smaller, leaving about a half inch tile border.
4 pictures printed to your smaller than your paper so you will have a pretty decorated border. I had to finagle these with my printer because I am COMPUTER ILLITERATE and couldn't figure out how to work the darn thing to make them the size I wanted, where I didn't have to cut them down.
OUTDOOR Mod Podge - it's very important you get the outdoor kind so it will make the coasters waterproof (you can get this at Michael's)
Foam paint brush
Felt (whatever color you like) - this goes on the back or each coaster so they won't scratch your table/counter surface
Aileen's tacky glue - or whatever kind of craft glue that you can use to adhere the felt to the back of each coaster
Directions:
Apply a layer of OUTDOOR Mod Podge to your tile, not real thin, but not goopy - somewhere in between. If you have too much, your picture will move. Lay your scrapbook paper down, smoothing from the inside out to the edges of your paper . . . . . .I used my Pampered Chef scraper for my stoneware! lol Set tile(s) aside and go do some wrapping, bake some cookies, or take a moment and have a nice hot cup of coffee.
After your Mod Podge and paper layer have dried, apply another coat to the entire tile, making sure to completely cover the paper. Now you are going to put your picture right on top of your background paper, making sure to again, smooth out the wrinkles working form the inside, out to the edges of your picture. Again, set aside and go do something FUN while it dries.
Now apply another coat of Mod Podge over your tile, completely covering the paper and picture. Set aside and go give your kiddos a big hug and tell them how much you love them! : > )
Ok, now we are down to the final steps. After your tiles dries, you are going to apply two (2) more coats of Mod Podge, allowing your tile to dry in between each coat. Now that you have finished your coasters, you need to allow them to cure for a day or two.
Now that your coasters have cured, it's time to put on the finishing touch, the felt. Lay your coaster on top of your felt and trace around all four edges and cut out. Apply your craft glue to the back, then adhere your felt. When the glue has dried, trim off the excess felt so it will be flush with the sides and not visible.
Now you are ready to wrap up your handmade personalized picture coasters all nice and pretty. See....that wasn't that hard, was it? I know you will really like these coasters and end up making a set for yourself. I also bought bigger tiles and will either make trivets or get those little tabletop stands and put them up as pictures to decorate the piano!
Don't forget, if you make these coasters, please come back and leave a link so we can come by for a visit and see your beautiful work!

I absolutely LOVE to make things whenever I can,
but I truly enjoy it most of all, when I get to create gifts for those special people in my life for their birthdays, anniversaries, weddings, and Christmas, etc. Here is one of the gifts I made for Bean coasters Don't worry, she won't see these pics. My family doesn't read my blog unless I tell them too! lolWhy have BLAH looking coasters , when you can have BEAUTIFUL and PERSONALIZED coasters instead? Remember.....you can you decorate these with any picture, graphics, you want!
These coasters are SOOO CUTE and SUPER UBER EASY TO MAKE! For these personalized coasters, you will need the following:
4 ceramic tiles in your choice of color, texture, and size (I like the textured 4x4 ones from Home Depot @ .31 cents each)
4 squares of scrapbook paper and cut these whatever size you want for your tile. I wanted a nice border of tile to be seen because I thought it was really pretty, so I cut mine paper smaller, leaving about a half inch tile border.
4 pictures printed to your smaller than your paper so you will have a pretty decorated border. I had to finagle these with my printer because I am COMPUTER ILLITERATE and couldn't figure out how to work the darn thing to make them the size I wanted, where I didn't have to cut them down.
OUTDOOR Mod Podge - it's very important you get the outdoor kind so it will make the coasters waterproof (you can get this at Michael's)
Foam paint brush
Felt (whatever color you like) - this goes on the back or each coaster so they won't scratch your table/counter surface
Aileen's tacky glue - or whatever kind of craft glue that you can use to adhere the felt to the back of each coaster
Directions:
Apply a layer of OUTDOOR Mod Podge to your tile, not real thin, but not goopy - somewhere in between. If you have too much, your picture will move. Lay your scrapbook paper down, smoothing from the inside out to the edges of your paper . . . . . .I used my Pampered Chef scraper for my stoneware! lol Set tile(s) aside and go do some wrapping, bake some cookies, or take a moment and have a nice hot cup of coffee.
After your Mod Podge and paper layer have dried, apply another coat to the entire tile, making sure to completely cover the paper. Now you are going to put your picture right on top of your background paper, making sure to again, smooth out the wrinkles working form the inside, out to the edges of your picture. Again, set aside and go do something FUN while it dries.
Now apply another coat of Mod Podge over your tile, completely covering the paper and picture. Set aside and go give your kiddos a big hug and tell them how much you love them! : > )
Ok, now we are down to the final steps. After your tiles dries, you are going to apply two (2) more coats of Mod Podge, allowing your tile to dry in between each coat. Now that you have finished your coasters, you need to allow them to cure for a day or two.
Now that your coasters have cured, it's time to put on the finishing touch, the felt. Lay your coaster on top of your felt and trace around all four edges and cut out. Apply your craft glue to the back, then adhere your felt. When the glue has dried, trim off the excess felt so it will be flush with the sides and not visible.
Now you are ready to wrap up your handmade personalized picture coasters all nice and pretty. See....that wasn't that hard, was it? I know you will really like these coasters and end up making a set for yourself. I also bought bigger tiles and will either make trivets or get those little tabletop stands and put them up as pictures to decorate the piano!
Don't forget, if you make these coasters, please come back and leave a link so we can come by for a visit and see your beautiful work!
Subscribe to:
Posts (Atom)